The post-purchase experience is a crucial aspect of e-commerce, and your WooCommerce Thank You page is an excellent opportunity to leave a lasting impression on your customers. In this guide, we’ll walk you through the process of creating a custom WooCommerce Thank You page using Elementor, all without the need for any coding expertise. Elevate your customer’s post-purchase journey by providing a personalized and visually appealing Thank You page.

Step 1: Install and Activate Elementor:
Ensure you have the Elementor plugin installed and activated on your WordPress site. Elementor is a user-friendly page builder that allows you to customize your pages with a simple drag-and-drop interface.
Step 2: Create a New Thank You Page:
Navigate to your WordPress dashboard and go to “Pages” -> “Add New.” Title your page as “Thank You” or any preferred name. Once you’ve created the page, click on the “Edit with Elementor” button.
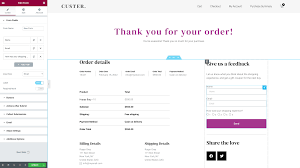
Step 3: Design the Layout:
Elementor provides a blank canvas for your creativity. Start by adding a section to your page. Choose a structure that suits your vision. You can experiment with a single column or multiple columns, depending on the content you want to include.
Step 4: Add Thank You Message:
Drag and drop a Text Editor widget onto your section. Craft a personalized thank you message expressing gratitude for the purchase. You can also include order details, such as the order number and a summary of the items bought.
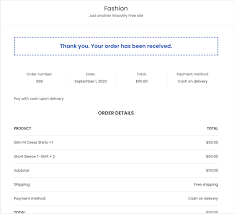
Step 5: Insert Dynamic Order Details:
Elementor allows you to insert dynamic content easily. Use the “Dynamic” option to add elements like the order number, customer’s name, and purchased products dynamically. This ensures that each customer sees personalized information.
Step 6: Incorporate Images or Icons:
Enhance the visual appeal of your Thank You page by adding images or icons that align with your brand. This could include a thank you graphic, a company logo, or any visual element that resonates with your customers.
Step 7: Include a Call to Action (CTA):
Encourage further engagement by adding a CTA button. This could lead customers to explore other products, sign up for newsletters, or follow your social media channels. Elementor allows you to customize the style and text of your CTA button easily.
Step 8: Utilize Elementor Templates (Optional):
If you’re looking for inspiration or wish to speed up the process, Elementor offers pre-designed templates. You can choose a template that aligns with your brand and modify it to suit your preferences.
Step 9: Preview and Save:
Before publishing your Thank You page, use Elementor’s preview feature to see how it looks. Make any necessary adjustments and click “Save” to ensure your changes are applied.
Step 10: Set as the Thank You Page in WooCommerce:
Go to WooCommerce settings by navigating to “WooCommerce” -> “Settings.” Under the “Checkout” tab, find the “Thank You” page option. Choose the custom Thank You page you just created from the dropdown menu.
Conclusion:
With Elementor, creating a custom WooCommerce Thank You page without any coding becomes an enjoyable and straightforward process. Personalize the post-purchase experience for your customers, express gratitude, and provide valuable information—all while maintaining the aesthetic that aligns with your brand. Elevate your online store’s customer journey and make every post-purchase interaction memorable with a custom Thank You page crafted using Elementor.
