In a world where email communication is paramount, consolidating your accounts can significantly streamline your digital life. If you’re looking to unite your webmail account with the powerful features of Gmail, you’re in the right place. This comprehensive guide will walk you through the steps, ensuring a smooth and efficient integration process.

Step 1: Gathering Information
Before you begin the linking process, collect essential information such as your webmail account login credentials, incoming and outgoing mail server details, and any specific settings required for your webmail provider.
Step 2: Access Gmail Settings
- Open your Gmail account on a web browser.
- Click on the gear icon in the upper-right corner.
- Select “See all settings.”
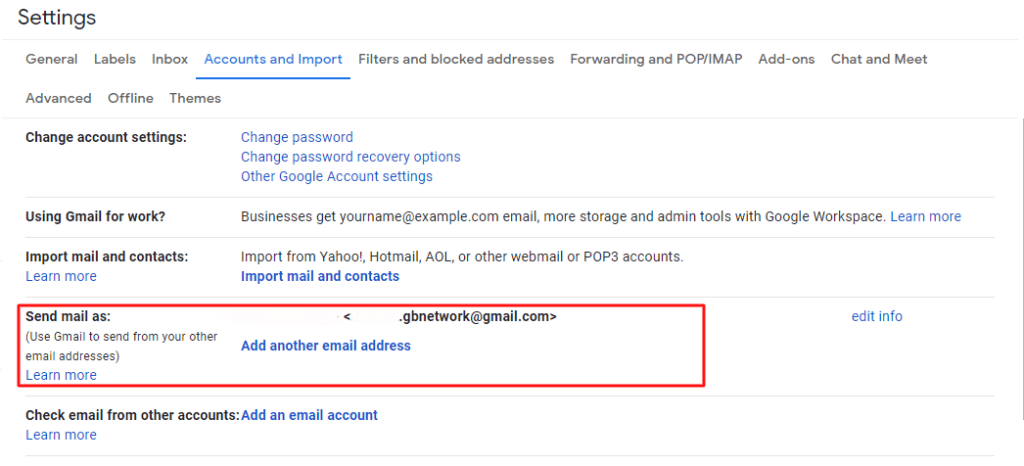
Step 3: Accounts and Import Tab
- Navigate to the “Accounts and Import” tab.
- Click on “Check mail from other accounts” in the “Check mail using POP3” section.
Step 4: Adding Your Webmail Account
- Click on “Add a mail account.”
- A new window will pop up. Enter your full webmail address and click “Next.”
- Choose “Link accounts with Gmailify” for popular providers like Yahoo or Outlook. For others, choose “Import emails from my other account (POP3)” and click “Next.”
Step 5: Configuring Incoming Mail Server Settings
- Enter your username (your full email address) and password.
- For the POP Server, input the incoming mail server address provided by your webmail provider.
- Configure the port (usually 995) and select the desired options for leaving a copy of retrieved messages on the server.
- Click “Add Account.”
Step 6: Configuring Outgoing Mail Server Settings
- Enter your full email address and password.
- For the SMTP Server, input the outgoing mail server address provided by your webmail provider.
- Configure the port (usually 587) and select options for securing the connection (TLS or SSL).
- Click “Add Account.”
Step 7: Verification
Gmail will now verify your account and fetch the existing emails from your webmail account. This process may take some time, depending on the number of emails.
Step 8: Customizing Settings
- Choose whether to label incoming messages from your webmail account.
- Decide if you want to archive incoming messages (recommended).
- Click “Add Filter” if you want to apply specific filters to your webmail messages.
Step 9: Complete the Process
Once the verification is successful, you’ll have the option to send emails from your webmail address through Gmail. Follow the prompts to complete the setup.
Conclusion:
By following these steps, you’ve successfully linked your webmail account with Gmail, creating a centralized hub for all your email activities. Enjoy the convenience of managing multiple accounts from a single interface, accessing Gmail’s powerful features while keeping your webmail messages seamlessly integrated. This process not only enhances efficiency but also ensures that you never miss an important email, regardless of the platform.
