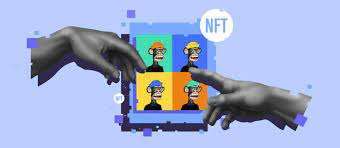
The world of digital assets has evolved rapidly, and Non-Fungible Tokens (NFTs) have emerged as a groundbreaking technology, revolutionizing the way we perceive and trade digital art, collectibles, and more. If you’re keen on joining this exciting space and creating your own NFTs, this guide will walk you through the step-by-step process of bringing your unique digital creations to the blockchain.
Understanding NFTs:

Before diving into the creation process, it’s crucial to grasp the fundamentals of NFTs. NFTs are unique digital tokens built on blockchain technology, typically the Ethereum blockchain. Each token is distinct, indivisible, and can represent various digital or physical assets. Artists, musicians, and creators use NFTs to tokenize their work, providing a secure and transparent way to prove ownership.
Step 1: Educate Yourself
Before creating NFTs, take the time to educate yourself on the blockchain and how NFTs function. Familiarize yourself with popular marketplaces like OpenSea, Rarible, or Mintable, where you can mint and sell your NFTs. Understanding the technology and the market will empower you in the creation and promotion of your digital assets.
Step 2: Create a Digital Wallet

To engage in the NFT space, you’ll need a digital wallet that supports Ethereum and NFTs. Wallets like MetaMask or Coinbase Wallet are popular choices. Set up your wallet securely, and ensure that you keep your private key safe, as it acts as the key to access and manage your NFTs.
Step 3: Choose Your Content

Decide what digital content you want to tokenize. NFTs can represent various forms of digital art, music, videos, or even virtual real estate. Ensure that your content is original and adheres to copyright laws. The uniqueness and authenticity of your creation will add value to your NFTs.
Step 4: Mint Your NFTs

Minting is the process of creating and tokenizing your digital assets. Platforms like OpenSea provide easy-to-use minting tools. Simply connect your digital wallet, upload your digital file, add details such as title, description, and properties, and mint your NFT. This process will generate a unique token on the blockchain representing your digital creation.
Step 5: Set Up a Marketplace Listing

After minting your NFTs, you can list them on NFT marketplaces for sale. Choose the appropriate marketplace based on your target audience and the type of content you’ve created. Customize your listing with engaging descriptions, images, and set a price for your NFTs.
Step 6: Promote Your NFTs

Building awareness is essential for the success of your NFTs. Leverage social media platforms, online communities, and your existing network to promote your creations. Engage with potential buyers, share the story behind your NFTs, and consider collaborating with influencers in the NFT space.
Conclusion:
Creating your own NFTs is an exciting journey that requires a blend of creativity, technical understanding, and effective promotion. By following these steps and staying engaged with the vibrant NFT community, you’ll be well on your way to showcasing and selling your unique digital assets on the blockchain. Embrace the opportunities that NFTs offer, and let your creativity thrive in the digital realm!


